CUZIPLY
Get a quote
FROM YOUR VEHICLE DRAWING TO THE PANEL ORDER

Plywood for vehicle floors and interiors.

Choose the floor for its working load and the interior for its finished use. Buy plywood for trailer and truck decks, van lining and RV interiors with the core, wearing face, weight and processing coordinated around your vehicle layout. Order sheets for your workshop or agreed cut and machined panels prepared for the next installation step.

CUZI PLY is your plywood manufacturer and direct supplier in Linyi, China, with 10 production lines. Work directly with our factory team to compare panel constructions, plan part sizes and protective packing, and get a quotation for your quantity and destination.

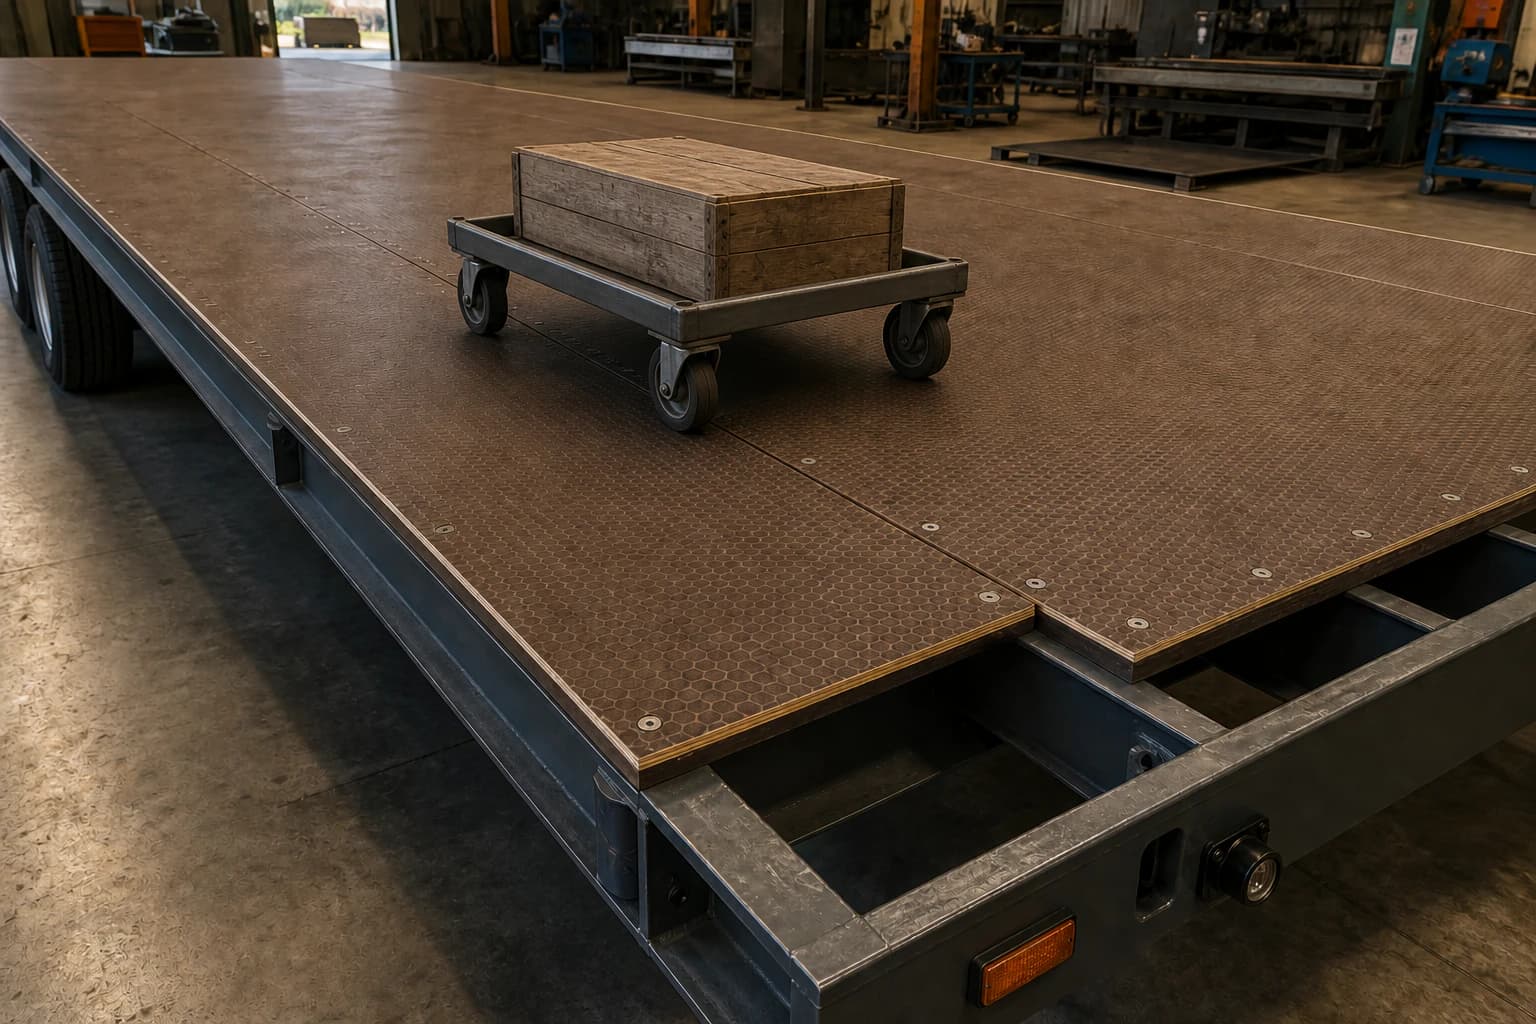
Textured plywood trailer deck with panel joints, fixings, exposed frame supports and a wheeled trolley
Plan the deck with its loads and supporting frame. Keep the wheel path, panel orientation, joints and supporting frame on the floor drawing. Specify the wearing face, fixing positions and protection of cut edges together, so each ordered panel fits the intended deck layout.
DESIGN THE DECK AROUND ITS WORK

Plywood for trailer flooring, from frame layout to wearing face.

Choose plywood for trailer floors with the frame, payload and loading method defined. Tell us whether the deck carries wheeled equipment, pallet loads, loose cargo or regular foot traffic. Keep support spacing, panel direction, joints, fixings and wetting conditions in the same floor specification.

Wheel and point loads

Give loaded wheel weights, contact areas, wheel paths and loading cycles. Small wheels and repeated loading require a different assessment from a uniformly distributed payload. Match the panel with its supports and relevant mechanical information.

Wire mesh plywood for trailers

This term commonly describes an embossed pattern on the coated face, not metal reinforcement inside the board. Specify the actual overlay, pattern, reverse face, core, bond and thickness. Ask for the slip and wear information relevant to your intended contact conditions.

Joints and panel orientation

Place panel joints and edge supports on the floor drawing. Identify span direction, profiles, fixing positions and installation clearances. Keep these dimensions with the chosen construction and vehicle builder’s instructions rather than applying one generic layout.

Weather, cleaning and repair

Describe open-deck exposure, wet cargo, road dirt, cleaning and the underside environment. Include protection of cut edges, holes and joints, with access to inspect worn faces or damaged areas.

Compare Anti-Slip Plywood, Birch Plywood and Hardwood Plywood with the complete deck requirements.

INCLUDE THE LOADING OPERATION

Plywood for truck flooring with the wheel path and service duty defined.

State whether goods are hand loaded, moved by pallet truck or handled by a forklift entering the body. Include loaded wheel weights, contact areas, travel paths, joint crossings and expected wear. Specify the surface, core, overall thickness, frame and edge protection together.

Loading equipment and body geometry

Give loading equipment details, floor level, wheel arches, rear threshold, cross-member positions and openings. Keep the operating load and support drawing with the selected panel; total payload alone does not describe wheel contact pressure.

Floor capacity and cargo restraint

Plan load restraint, anchor points and body attachments as part of the vehicle design. A suitable wearing face or floor panel does not, by itself, establish an anchorage rating or secure the cargo. Coordinate the floor order with the body builder’s restraint arrangement.

For US commercial transport, review the FMCSA cargo securement guidance alongside the vehicle and cargo requirements. Floor selection and cargo securement are separate design tasks.

FIT THE PANEL TO THE BODY

Plywood for van lining: floors, walls and doors do different work.

Plywood van lining can protect interior surfaces, provide a finished appearance and create a practical base for agreed fittings. Separate the load-bearing floor from side, door and ceiling linings. Give the vehicle geometry, mounting locations, clearances and service openings for each panel.

Shaped and handed panels

Give the vehicle model, year, wheelbase and body height where relevant, then dimension curves, wheel arches, door apertures and access covers on the part drawing. Identify left- and right-hand panels, the visible face, decor or grain direction and installation reference points. Keep the model details with that drawing so the ordered parts follow your particular body layout.

Attachments and moisture

Keep fixing locations with the vehicle structure and selected hardware. Include condensation, ventilation, cleaning, exposed edges and new holes made on site. Connect cargo-restraint anchors and structural attachments to the specified vehicle frame; order the protective liner with its own finish and mounting requirements.

Coordinate Cut-to-Size Plywood and CNC Plywood Components with your part drawings and supplied finish.

KEEP THE WEIGHT BUDGET WITH THE PART

Plywood for RV interiors that balances panel mass, appearance and fit.

Choose cabinet, partition, wall, ceiling and floor components separately. Give the finished panel mass target, sizes, supports, furniture attachments and visible finish. Include the laminate or coating and hardware in the weight budget, not only the bare plywood.

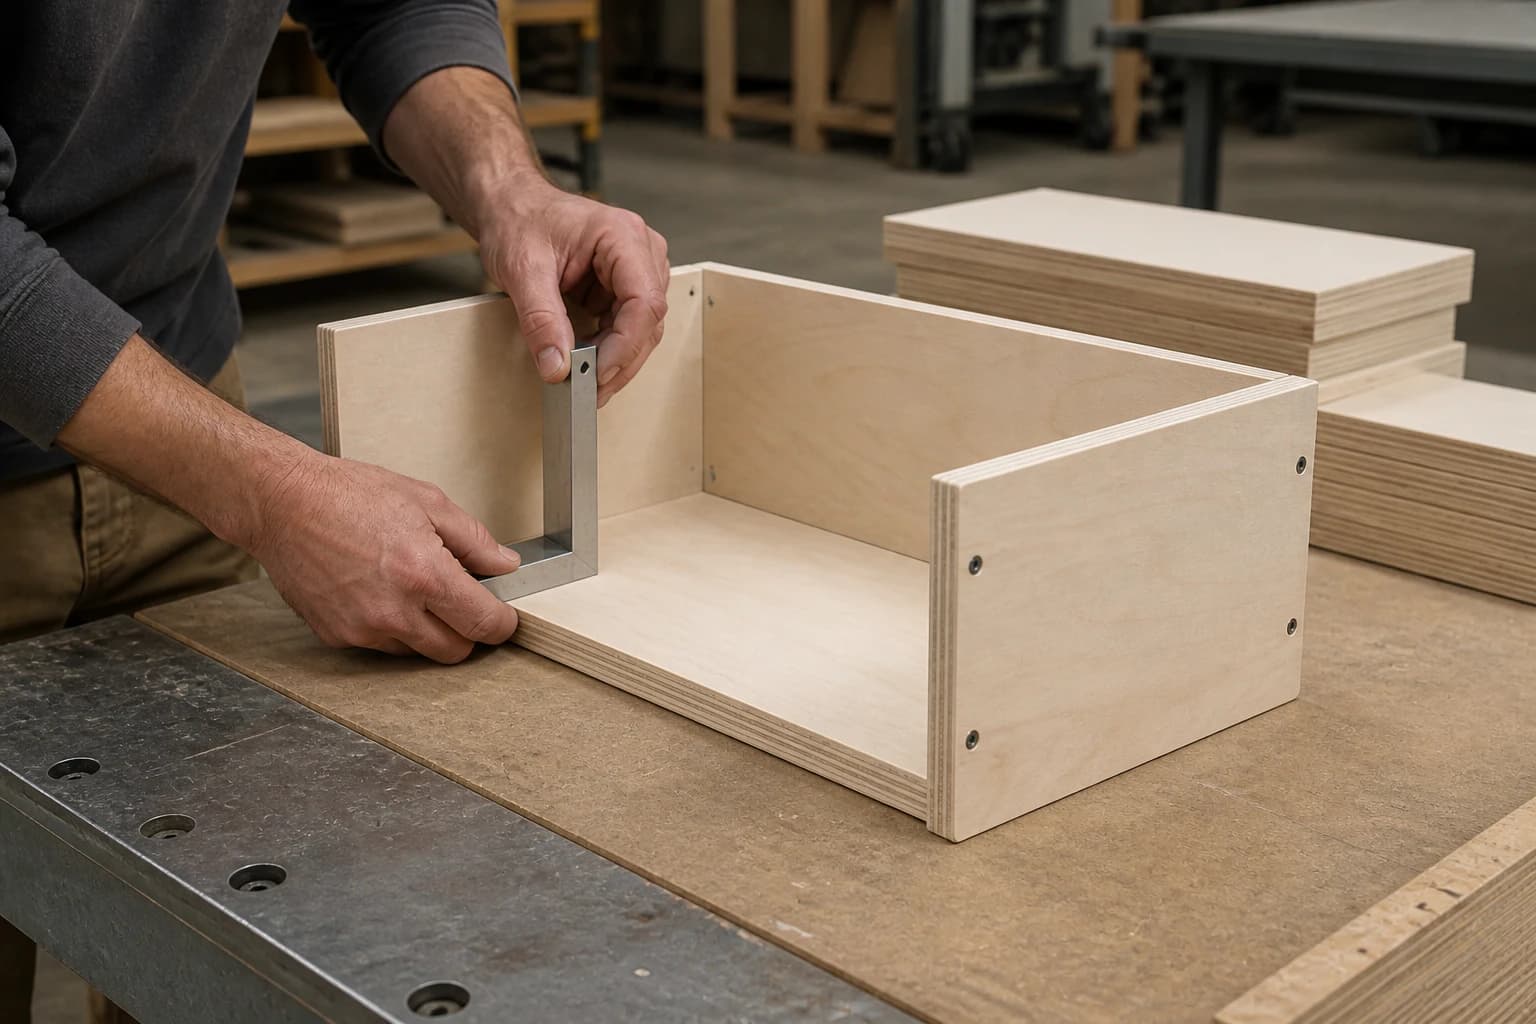
Light-coloured plywood furniture component with layered edges, screw fixings and a square checking its corner
Specify lightweight interior parts for their fixings. Choose interior plywood with the part dimensions, finished mass, joints and hardware in view. Identify the visible face, screw locations and edge finish, and keep furniture attachments separate from floor-loading requirements.

Furniture, lining and partitions

Compare Poplar Plywood and Lightweight Plywood with the joints, fixings, finish and supports. Mark parts carrying hardware or attached furniture so the construction fits the actual component.

Floors and occupied interiors

Assess floor loading and support separately from cabinet or lining weight. Give the vehicle’s applicable interior requirements, including emissions, fire performance, ventilation and moisture around kitchens or washrooms. Lightweight alone is not a floor load rating.

Use Cabinets & Kitchen Furniture for fitted storage and Plywood Density, Weight & Strength when preparing the component order.

NAME THE WALL PANEL’S FUNCTION

Truck body panels, railway interiors and container wall linings.

Identify whether the panel is an interior lining, decorative component, load-carrying part or part of a specified body assembly. Give its position, attachments, finish and vehicle or operator requirements. The plywood order should describe the material and processing that your assembly needs.

Plywood for truck body panels

Separate interior liners from structural body sides, partitions and complete sandwich-panel assemblies. Include fixing loads, frame or adhesive interfaces, impact, cleaning and exposure. Identify any skins, insulation or additional work in the specified body construction.

Plywood for railway interiors

Give the vehicle and component position, operator specification and required mechanical, fire, smoke and finish information. Match material and component documents to the complete supplied construction and intended use. A general fire-retardant description does not establish a railway classification.

Plywood for container side walls

State whether this is an internal protective liner or part of a designed wall assembly. Specify impact and fixing requirements, moisture exposure, cleaning, joints and the receiving structure. A plywood liner is not automatically a replacement for a freight container’s structural shell.

Panel supply and body construction

Choose full sheets, cut panels or agreed machined components, with the remaining work identified. Vehicle structure, restraint systems, complete body manufacture and installation stay with the specified vehicle project; your quotation identifies the plywood and processing supplied.

Review Plywood Fire Performance, Plywood Acoustic Performance and Standards & Certifications with your vehicle specification.

COMPARE THE COMPLETE PANEL

Choose a plywood construction for each floor and interior part.

Select the face and reverse, core, bond, overall thickness, mass and supplied finish. Keep the required mechanical, wear, slip and interior information with the intended use. A material name helps shortlist the panel; the complete specification defines what you buy.

Anti-Slip Plywood

Textured wearing faces for specified trailer, truck and working-floor duties.

Pattern, overlay, reverse face, core, bond, thickness and the slip and wear information needed for the actual contact conditions.

Birch & Baltic Birch Plywood

Machined floor and interior components with defined fixing, strength and edge requirements.

Complete construction, panel orientation, support spacing, finish, important fit dimensions and product data for the intended loads.

Also compare Baltic Birch Plywood.

Hardwood & Container Flooring Plywood

Floor constructions to compare when loading, core structure and machining determine the specification.

Give the vehicle builder’s floor requirements, support layout and loading conditions. Compare the selected construction, mechanical information, treatment and finish for that deck.

Also compare Container Flooring Plywood.

Poplar & Lightweight Plywood

RV furniture, lining and interior components where panel mass affects the vehicle weight budget.

Finished panel mass, core, faces, hardware, attachments and supports. Choose floor and furniture parts separately rather than treating every lightweight panel as a load-bearing deck.

Also compare Lightweight Plywood.

Plastic-Coated & Film Faced Plywood

Coated faces for agreed lining and working-panel requirements.

Surface, reverse, core, bond, cleaning, abrasion and edge protection. Select the finish for its actual duty; a smooth film face is not a slip rating.

Also compare Film Faced Plywood.

HPL & Melamine Plywood

Decorative interior panels and furniture faces with coordinated appearance.

Decor, laminate or coating, balancing reverse, overall thickness, edges and hardware. Include the vehicle project's emission and fire requirements where applicable.

Also compare Melamine Plywood.

Regular sheet formats: 1220×2440, 1250×2500, 1525×3050 mm. On-request formats: 1250×3050, 1250×3660, 2100×2800, 1830×3660, 1250×3800 mm. Give the final floor or lining part dimensions, thickness and quantities. These sheet formats are starting sizes for your panel layout.

CONNECT THE PANEL TO THE FRAME

Loads, supports and fixing details belong on the same floor drawing.

Include support spacing, bearing positions, panel direction, joint locations and the real loading arrangement. Give laden wheel loads, contact areas and loading cycles alongside the total payload. Your floor designer uses the selected panel’s mechanical information with the frame and connections to check that deck arrangement.

Frame, edges and joints

Identify cross-members, joint supports, floor thresholds and edge bearing. Give fixing type and position, profiles, clearances and the final floor level. Follow the selected vehicle floor and fixing instructions, including any additional support around openings.

Loads and vehicle weight

Include wheel and point contact loads, loading cycles, equipment positions and the finished panel mass. Keep the floor, furniture and body contribution within the vehicle weight budget. Cargo restraint and anchor design need their own load and attachment requirements.

Use Plywood Density, Weight & Strength with the selected construction and load arrangement, not as a substitute for a vehicle floor calculation.

SPECIFY THE CONDITIONS AT THE SURFACE

Wearing face, grip, edge protection and maintenance.

Specify what contacts the face: footwear, tyres, wheels, pallet feet or cargo. Include water, dirt, oils, cleaning and wear. Choose the surface, bond, reverse and cut-edge protection with these conditions and the intended inspection or repair process.

Grip and wear information

Request the relevant method and conditions for any required slip or abrasion performance. A textured appearance is not a universal grip rating, and a wearing-face result does not establish the panel’s floor load capacity.

Edges, holes and underside

Protect machined edges, fixing holes, joints and newly cut openings according to the chosen sealing system. Include underside exposure, condensation and cleaning. Plan maintenance so worn or damaged areas can be identified and repaired.

Coordinate Surface & Overlay Options, Bonding & Emission Options and Plywood Moisture & Water Resistance.

MAKE INSTALLATION FIT PART OF THE ORDER

Floor and lining panels with planned cutting and machining.

Give each part a reference, finished size and quantity. Locate profiles, holes, rebates and openings from named reference faces and edges. Keep panel direction, the wearing or visible face, fit dimensions and protection of newly machined surfaces with the drawing.

Profiles and vehicle geometry

Dimension wheel arches, access covers, joint profiles, door openings and fixing positions from the drawing’s named reference edges. Identify handed parts, matching panels, joint clearances and the finished floor level. Tell us which cuts or holes will be completed by your workshop.

Finished size and supplied stage

Choose full sheets, cut panels or agreed machined components. Include any coating, edge treatment and important final dimensions in the supplied stage. Quote each part ID and drawing revision, including face direction and positions that must align with adjacent panels. Keep those details for repeat orders.

Plan Cut-to-Size Plywood, CNC Plywood Components and the Plywood Processing Services together.

REQUEST INFORMATION FOR THE SELECTED CONSTRUCTION

Panel, processing and project documents for your vehicle order.

Provide the destination, vehicle use and builder or operator specification with the selected panel and finish. Request relevant mechanical, bond, wear, slip, emission, fire or sourcing information. Match the document’s product identity, construction and use to the component you are ordering.

Floor performance

Keep mechanical information with panel direction, support spacing and the specified loads. Request surface wear or slip information separately, with the method and contact conditions. Match treatment and exposure requirements to the selected panel.

Occupied and railway interiors

Include the applicable vehicle fire and smoke requirements and the complete finish, adhesive and substrate. EN 45545-2 concerns fire behaviour of railway materials and components. Identify the railway classification and component position your operator requires, then connect the material and finish documents to that specified assembly.

See the BSI EN 45545-2 reference and our Plywood Fire Performance guide.

Interior emission and sourcing needs

Give the destination and project requirements for emissions and sourcing with the face, core and coating. Connect any required claim and supporting records to the supplied panel rather than treating every finish or vehicle use as the same product.

Review Plywood Emissions: US & EU and Sourcing: FSC, PEFC & EPD.

Component and vehicle requirements

Material documents help select the plywood. Frame design, installed loading, anchorages, complete body fire or acoustic performance and installation requirements also depend on the vehicle assembly. Keep those requirements with the vehicle designer’s specification.

Send the vehicle or operator specification with your part list. We connect the selected panel construction, producer and product identification, report or certificate references and order details. Custom floor and lining dimensions remain part of that order specification.

START WITH THE VEHICLE AND PARTS YOU NEED

Component dimensions, quantities and enquiry details.

Send the vehicle use, floor or lining sizes, thickness, quantities and destination first. Add the loading, supports, surface and processing you already know. If the core, bond or wearing face is undecided, write “Need advice” in Requirements. Our factory team helps complete the panel choice and processing specification with the details you have.

RequirementWhat to includeWhy it matters
Vehicle and componentTrailer deck, truck floor, van floor or side lining, RV furniture, railway interior or container wall lining.Select for the part and its service conditions instead of giving all vehicle panels the same specification.
Loads and support layoutPayload, laden wheel or point loads, wheel contact areas, travel path, loading cycles, cross-member spacing, joint supports and attachments.Assess the plywood with the frame, panel direction and loading arrangement. Keep cargo restraint and anchors in the vehicle design.
Panel construction and massFace and reverse, core, bond, overall thickness, wearing surface and finished panel mass where important.Compare the complete construction and its contribution to the vehicle weight budget.
Finished dimensions and quantitiesPart IDs, units, final sizes, quantities, handed panels, matched sets and drawing revision.Connect cutting and machining to the receiving list and installation layout.
Surface and exposureFootwear, tyres or cargo contact, wear, water, road dirt, cleaning chemicals, temperature and ventilation.Choose the face, bond and protection for the conditions the panel will actually encounter.
Joints, edges and machiningPanel orientation, joint profiles, clearances, fixing holes, wheel-arch or service cutouts, edge protection and later cuts.Keep fit, support and moisture protection with the finished part, including work done after delivery.
Vehicle and product documentsDestination, vehicle or operator specification, selected construction, required mechanical, wear, slip, emission, fire or sourcing information.Match relevant documents to the panel and component. Material information and complete vehicle requirements serve different purposes.
Supplied stage and deliveryFull sheet, cut panel or agreed machined component, remaining installation work, pack grouping, destination and target date.Quote the same processing stage and protect panels for receiving and the next operation.

Send drawings by email or WhatsApp with part IDs, units, revision and the wearing or visible face marked. Identify the panels for each vehicle set and the cuts your workshop will finish. Compare face and core constructions, bond and emission requirements and our plywood specification guide when preparing the order.

QUOTE THE SAME MATERIAL AND PROCESSING STAGE

An organised panel order, from quotation to installation.

Compare the complete construction, wearing or decorative face, machining, checks and delivery basis. Keep the first order, repeat parts, production timing and transport arrangements clear before comparing prices.

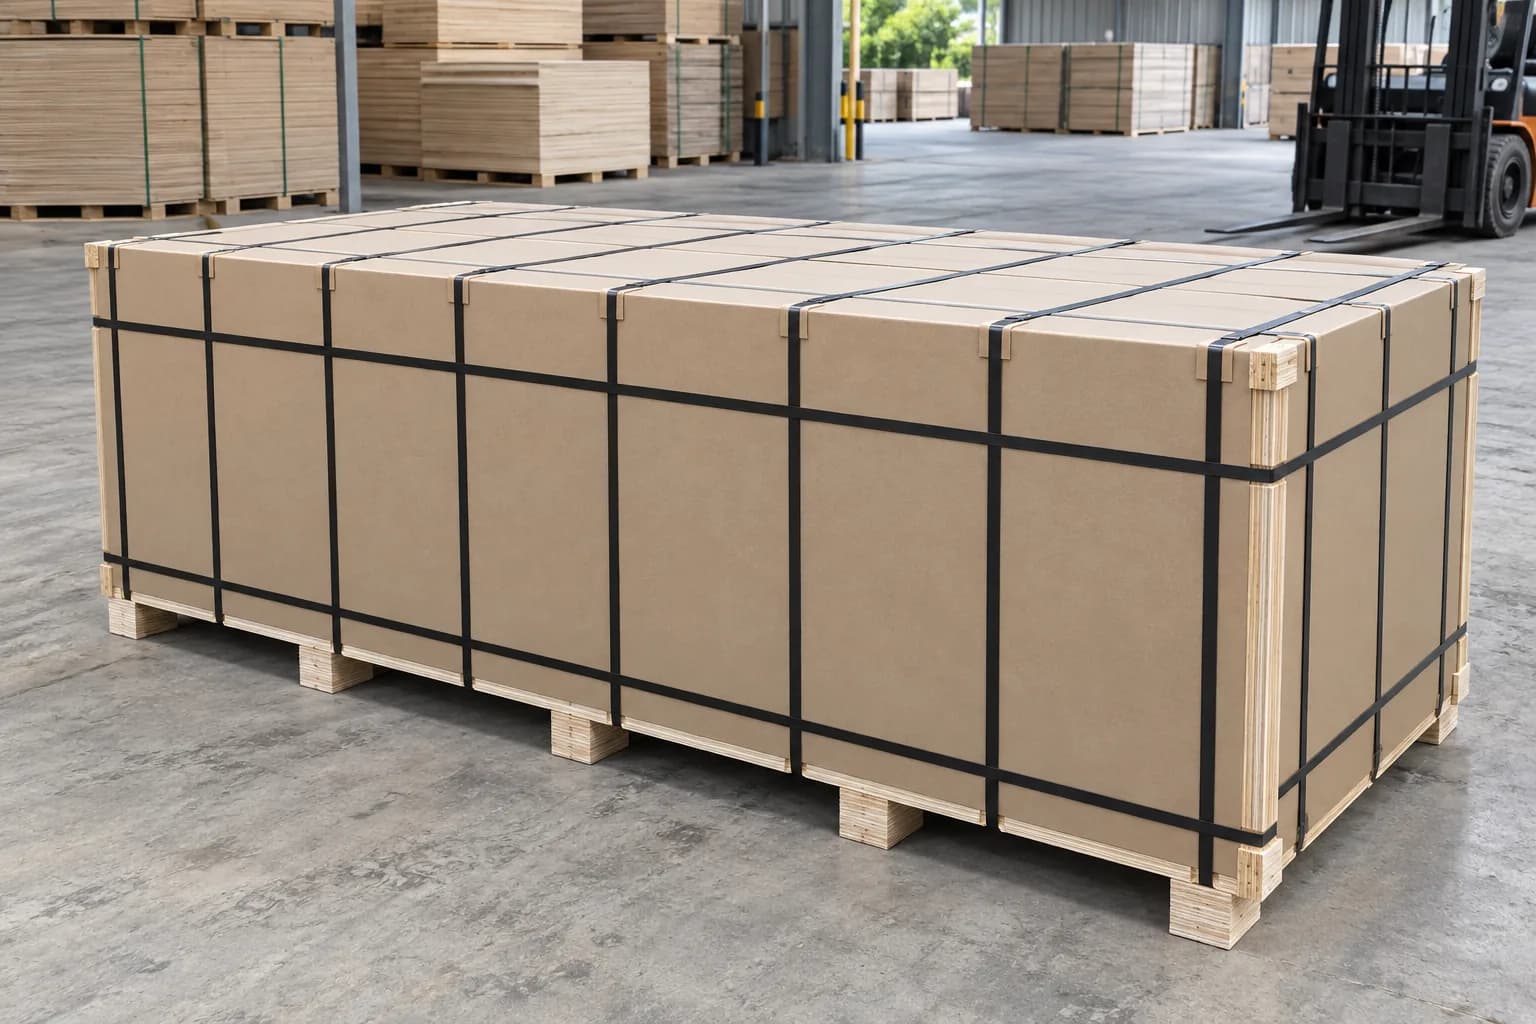
Plywood package with protective outer boards, corner blocks, straps and timber supports
Protect vehicle panels for receiving and installation. Group floor and lining parts by reference, orientation and quantity. Protect wearing faces and machined edges, support the packs and connect their labels to the receiving list and installation sequence.

Part labels and protected packs

Group floor and lining panels by vehicle set, body section or installation sequence. Mark part reference, wearing face, orientation and quantity, including left- and right-hand pieces and spare panels. Protect textured or decorative faces, profiles and cut edges, with supported packs and labels matched to the receiving list.

Receiving and repeat supply

Tell us about receiving equipment, storage and the next installation operation. Keep the panel construction, drawing revision, finish, labels and packing details together when repeat orders are quoted.

Plan Packing & Container Loading and Quality & Inspection with your panel order.

Panel construction and quantity

Compare the same core, bond, finished thickness, face and reverse. Identify floor, lining and furniture quantities separately.

Surface and finishing

Include wearing face or decor, cleaning requirements, edge and hole protection and any finish completed after delivery.

Cutting and machining

Include profiles, joint details, fixing holes, openings, drawing preparation and important final dimensions. Separate first-order preparation from repeat-part pricing.

Checks and documents

State the selected panel's required product information, dimensions and appearance checks, and the vehicle project's document requirements.

Protection and identification

Include panel orientation, part labels, matching sets, supported packs, face separation and protection of machined edges.

Order and transport terms

Agree quantities, production timing, delivery term, named destination and included charges. Keep shipment time separate from production time.

Order quantity & mix
Tell us the sheet size, thickness mix and quantity you need. We confirm the minimum order and available mix for your selected construction.
Production lead time
We confirm the production schedule with your specification, order quantity and sample requirements. Production lead times are planning estimates, not transit times.
Price & quotation unit
Currency and price unit stated in your quotation. Your quote is based on the agreed dimensions, construction and quantity. Processing and requested testing are stated separately where applicable.
Samples
Tell us the plywood, thickness, finish and delivery country. We confirm sample availability, any sample and courier costs, and dispatch arrangements before proceeding.
Packing & delivery
We agree export packing, labels and the loading plan for your order. Share the destination country, named port or delivery point and preferred delivery term. Freight, insurance, duties and taxes are included only when stated in the quotation.
Payment & order confirmation
We agree the payment method, currency and any deposit and balance schedule in the quotation or proforma invoice. Your order confirmation sets out the product, quantity, packing and delivery arrangements.
Further guidance for vehicle panel purchasing

Read technical and transport requirements with your selected plywood and the complete vehicle design.

BUYER QUESTIONS

Floors, lining and vehicle requirements

Questions about plywood for vehicles, trailers and RVs.

Can I buy vehicle plywood directly from CUZI PLY?

Yes. CUZI PLY is the plywood manufacturer and direct supplier in Linyi, China. We supply selected plywood as sheets or agreed cut and machined panels. Give the vehicle use, component, construction, thickness, sizes, quantities and destination so our factory team can quote the material, processing and packing together.

Which plywood should I use for trailer floors?

Start with the loading and frame. Give payload, wheel and point loads, contact areas, support spacing, panel direction and joint positions. Then select the core, thickness, wearing face, bond, fixings and edge protection with the floor designer. One thickness or an anti-slip label is not a complete deck specification.

What does wire mesh plywood mean for a trailer?

The term commonly describes an embossed pattern on the coated plywood face, not a metal mesh reinforcement inside the panel. Specify the actual overlay and pattern, complete construction, reverse face, thickness and the wear or slip information required for your use.

Can a plywood floor rating cover forklift traffic?

Provide the laden wheel loads, tyre or wheel contact areas, travel path, loading cycles and support layout. Match relevant panel information to those conditions and the complete deck design. Distributed payload alone does not describe a small wheel's contact load, and floor capacity is separate from cargo restraint.

Does a textured face guarantee grip in every condition?

No. Footwear, tyres or cargo contact, water, dirt, wear and cleaning can change the working conditions. Specify the relevant contact and test conditions and plan inspection and maintenance. The embossed pattern alone does not establish a universal slip performance.

Can you supply cut plywood van lining?

We can quote panels to the agreed dimensions and machining requirements. Give the vehicle model, year, wheelbase and body height where relevant, together with dimensioned part drawings, left- and right-hand pieces, mounting points, clearances and service openings. Use the drawing revision and part IDs for the panels being ordered, and identify the installation work your workshop will complete.

Is lightweight plywood suitable for every RV floor?

Choose floor and furniture parts separately. Panel mass matters in an RV, but floor supports, loads, fixings, moisture and the complete construction still determine suitability. Poplar and lightweight plywood can be compared for interior components with the part and hardware requirements.

How should cut edges and drilled holes be protected?

Specify edge, hole and joint protection with the face and bond. Include new cuts made during installation, wheel-arch openings, underside exposure and cleaning. Follow the selected finishing and sealing system's instructions, and keep access for inspection and repair where needed.

Can a lining panel act as a load restraint or anchorage?

Keep these functions in the vehicle design. A wall liner protects or finishes the interior; it is not automatically a structural body panel or a rated cargo-restraint anchor. Give the attachment and load requirements, and connect anchors to the specified vehicle structure.

Which documents are needed for railway interiors?

Send the operator specification, component position and destination with the complete material and finish. Identify the railway classification and fire, smoke, mechanical or acoustic information your project requires. We connect the requested panel documents to the selected construction, finish and order, while the vehicle designer coordinates the complete component and assembly requirements.

Do you supply the complete trailer, camper conversion or installed floor?

We supply plywood sheets and agreed cut or machined panels, with the material, processing and packing identified in your quote. Your vehicle builder coordinates the frame, complete body or camper conversion, restraint systems and installation with those supplied parts. Tell us the stage at which your workshop wants to receive the panels.

How can I assess the panel before placing a larger order?

Use Request a Sample and identify the construction, thickness, wearing face or decor, and edge or machining detail you need to assess. Give the intended use and destination. If the core, bond or surface is undecided, write Need advice in Requirements and describe the loads, supports or interior part. We confirm preparation, availability, sample and courier costs and dispatch arrangements. Include the product information needed for your project alongside the appearance and fit checks.
MAKE YOUR NEXT VEHICLE PANEL ORDER CLEARER

Tell us which floor and interior panels you need.

Give the vehicle use, component, construction, thickness, finished sizes, quantities and destination. Add loads, supports, wearing face, machining and important project documents. We will help complete the panel choices and quote the plywood, agreed processing and protective delivery.

For a physical assessment, identify the construction, wearing face or decor and the edge or machining detail you need. We confirm preparation, availability, sample and courier costs and dispatch arrangements.